There’s a very specific silence that falls over a kitchen when dinner goes wrong. One second you’re stirring, scrolling through your phone with the other hand, the next you smell it: that sharp, bitter scent of food turning from “crispy” to “charcoal”. You yank the pan off the heat, but it’s already there – a black, welded crust clinging to the bottom like it pays rent. The smoke alarm complains, the kids ask what’s burning, and you stare at your ruined pan wondering if it’s cheaper to just throw it away.
The worst part isn’t the meal. It’s that cold moment at the sink, when hot water does nothing and the sponge squeaks helplessly over the burned patch. You leave it to “soak”, pretending that’s a strategy.
Then someone mentions vinegar and baking soda.
The science behind the vinegar and baking soda trick
The first thing that hits you when you pour vinegar into a burnt pan is the smell. Sharp, almost aggressive, like the kitchen is waking up. You turn on the hob again, bring that thin layer of liquid to a simmer, and suddenly the black crust doesn’t look quite so invincible. Tiny bubbles creep around the edges, the burnt ring softens, and for the first time since dinner derailed, you feel a hint of control coming back.
It’s such a small gesture – just covering the bottom with vinegar – yet the mood shifts. The disaster starts to look like a fixable problem, not a full-on tragedy in stainless steel.
One woman I spoke to swears this trick saved her favourite pan after a Sunday-night pasta gamble went wrong. She forgot the sauce on low heat while hunting for a missing lunch box, then returned to a pot of tomato cement fused to the base. Scraping didn’t help, soaking didn’t either. She even thought about ordering a new pan from her phone, right there over the sink.
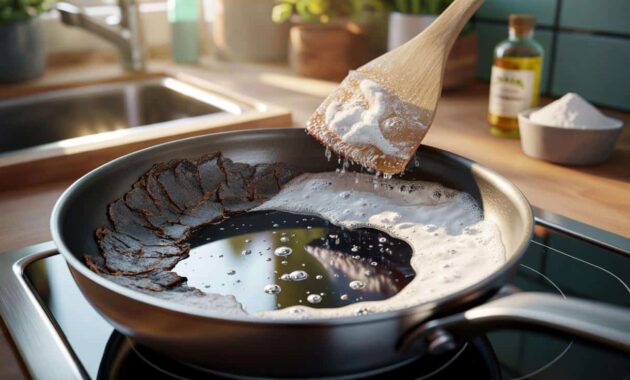
On a whim, she tried the “vinegar and baking soda thing” she’d seen in a random video. A shallow bath of white vinegar, a short simmer, burner off, then a generous snowfall of baking soda. Within minutes, the surface started to hiss and fizz like a science project from school. When she finally took a wooden spatula to it, the burnt layer peeled away in sheets.
There’s nothing magical about it, even if it feels that way. Vinegar is acidic, and those burnt food residues are a stubborn mix of carbonized sugars, fats, and proteins clinging to the metal. The warm acid helps loosen that bond. Then comes baking soda, an alkaline powder that reacts with the vinegar, creating carbon dioxide bubbles that creep into the tiny gaps between pan and residue.
Those bubbles gently lift and fracture the crust, turning what felt fixed and permanent into something that suddenly wants to let go. It’s not brute force. It’s quiet chemistry doing the heavy work while you stand there, watching the fizz.
The step‑by‑step method that actually works
Start with what you see: a pan that looks ruined. No need for fancy measurements. Cover the bottom of the cooled pan with a thin layer of white vinegar, just enough to reach all the burned surfaces. Place it back on medium heat and let it slowly come to a gentle simmer, not a rolling boil.
➡️ A strange anomaly under Antarctica’s ice has been confirmed by satellites and it’s massive
➡️ Semaglutide May Reverse Damage Caused by Osteoarthritis, Study Suggests : ScienceAlert
➡️ The simple trick that makes homemade cookies smell like a bakery while baking
➡️ Pellets: the little-known trick to save big on your heating before autumn
➡️ The overlooked preparation step that determines whether homemade lasagna holds together perfectly
After a few minutes, turn off the heat and let the vinegar sit for another five. This pause matters. It lets the acid sneak into cracks and soften the scorched food. Then, while the liquid is still warm, sprinkle baking soda across the surface. The reaction starts instantly – fizzing, foaming, whispering that you might not need a new pan after all.
This is where plenty of people go wrong: they rush. They see the foam, grab a metal scourer, and attack the pan like it personally betrayed them. That’s how coatings get scratched and non-stick surfaces end up ruined for good. The trick is to let the mixture do its job. Give it ten minutes. Walk away. Scroll, breathe, answer that message you ignored during the kitchen chaos.
When you come back, use a wooden spatula or a soft sponge. The burnt layer should come off in flakes or soft swirls, not in desperate shavings. If a patch is still hanging on, repeat the process instead of pushing harder. *Gentle repetition beats violent scrubbing almost every time.*
“Let’s be honest: nobody really stands there scrubbing a pan for 40 minutes after a long day,” laughs Claire, a home cook who now relies on this method weekly. “A soak, some vinegar, a bit of baking soda, and suddenly I’m not angry at my cookware anymore.”
There are a few simple tweaks that make the method more reliable:
- Adjust the vinegar level – Just enough to cover the burnt area. Too much wastes product and dilutes the effect.
- Use plain white vinegar – Flavoured or coloured vinegars can leave marks or smells you don’t want.
- Keep metal on metal to a minimum – On non-stick or enamel, avoid steel wool completely.
- Repeat light cycles – Two short rounds are kinder to your pan than one aggressive scrub.
- Rinse thoroughly – A quick wash with washing-up liquid removes any lingering smell.
Why this small ritual changes more than just your pan
Once you’ve seen a “ruined” pan come back to life under a fizz of supermarket vinegar and cheap baking soda, something shifts in how you look at mess. You start to realise that not every kitchen mistake is a write-off, not every burnt edge is a catastrophe. It becomes a quiet ritual: the incident, the frustration, the pause, the simmer, the fizz.
We’ve all been there, that moment when you want to throw everything in the bin and order takeout instead. This little trick doesn’t just save metal; it saves that urge to give up on the whole evening.
You also notice how freeing it feels to rely less on harsh chemicals. No choking fumes, no eye-watering sprays that promise miracles then deliver headaches. Just two humble powders from the back of the cupboard, doing their slow, patient work. It’s strangely grounding.
You stand at the stove listening to the soft hiss, feeling like you’re borrowing some old domestic wisdom that people used long before bright plastic bottles filled supermarket shelves. Not perfect, not spotless, just… enough.
Maybe that’s why this method keeps popping up in conversations, videos, and comment threads. It spreads quietly, one rescued pan at a time. Not as a miracle hack, but as a small reminder that most problems in the kitchen have a second chance built in.
Next time you smell that dreaded burnt scent, you might still curse under your breath. You might still open the window and wave away the smoke. Yet somewhere in the back of your mind, you’ll also know there’s a way back from the blackened bottom of that pan – and that knowledge alone changes the mood of the whole room.
| Key point | Detail | Value for the reader |
|---|---|---|
| Acid then alkali | Warm vinegar loosens burnt food, baking soda and bubbles lift it off | Less scrubbing, fewer damaged pans |
| Gentle tools | Use wooden spatulas and soft sponges, avoid steel wool on coatings | Extends the life of non‑stick and enamel cookware |
| Repeat, don’t fight | Two short vinegar–baking soda cycles beat one aggressive clean | Reduces effort and frustration after cooking disasters |
FAQ:
- Can I use this method on non‑stick pans?Yes, but keep the heat low to medium, avoid boiling dry, and only use soft sponges or cloths. If a spot is stubborn, repeat the cycle rather than scrubbing hard.
- Does the vinegar smell stay on the pan?No, a quick wash with hot water and washing-up liquid removes the smell. Let the pan air-dry or wipe it, and any trace of vinegar disappears.
- Will this work on very old, blackened pans?It can dramatically improve them, though years of built-up carbon might need several rounds. Some of that deep black layer is baked-on patina, not dirt, and can actually help with natural non-stick.
- Can I replace vinegar with lemon juice?You can, as lemon is also acidic, but vinegar is cheaper and usually more effective. Lemon might leave a light fragrance, which some people enjoy.
- Is this safe for cast iron?You can use a short vinegar simmer on cast iron occasionally, but rinse quickly, dry thoroughly, and re-oil straight after. Long soaks in acid can damage seasoning.