I thought the insulation job would be the whole story: warmer rooms, gentler bills, fewer winter complaints. Then the site engineer walked me through the leaks, the vents, and the system settings I’d been ignoring. That’s when the house finally clicked, and the savings followed without the sticky-notes on every radiator.
Comfort begins before the meter
People expect to notice the numbers first. You often notice your body instead. Fewer cold corners. No twitchy draft under the skirting. A wall you can touch without a shiver. When surface temperatures rise and even out, comfort stops feeling like a hunt for hotspots. Condensation retreats. You use every room the same way, not just the one with the sunny chair.
External insulation cuts heat loss through the shell and slows down heat gain in summer afternoons. Think of it as smoothing spikes. The boiler or heat pump cycles less. The room swings narrow. Energy spend drops because your home stops fighting itself.
Insulation shines when the house works as a team: airtight shell, clean ventilation, tuned system, and no sneaky thermal bridges.
What makes insulation actually work
Three checks decide whether that new “coat” earns its keep: air tightness, ventilation, and system balance. Miss one, and the gains leak out in different clothing.
Air tightness, the quiet partner
Heat does not just conduct through walls. It hitches a ride on uncontrolled air. Gaps around loft hatches, sockets on external walls, old roller shutter boxes, and window frames create constant loss. Seal them with gaskets, tapes, and airtight back boxes. Ask for a blower-door test before and after work. A decent target for existing homes sits near 3–5 air changes per hour at 50 Pa; many older properties start above 8 ACH50. Every notch down lowers drafts and gives your insulation a fair fight.
Chase the leak with a smoke pencil on a windy day. If the smoke bends at a socket, that’s not a party trick. It’s your money leaving.
Ventilation without waste
Fresh air matters, but fling-open windows can dump heat in minutes. You can ventilate smartly. Use short, sharp airing in winter, or fit single-room mechanical units with heat recovery where humidity spikes. Bathrooms and kitchens benefit first. Keep indoor relative humidity near 40–55%. That zone protects lungs, wood floors, and paint, and it keeps mould at bay once cold surfaces warm up.
Tune the heating system
Post-insulation, your system needs smaller sips. Lower the flow temperature. Balance radiators. Set thermostatic valves to match room use. Heat pumps need the right curve and longer, gentler runs. Boilers prefer lower setpoints and weather compensation. If you changed the fabric, update the controls, or you drive with the handbrake on.
- Seal obvious gaps before the cold hits: loft hatches, pipe penetrations, window perimeters.
- Fix thermal bridges around balconies, lintels, and slab edges or add targeted insulation.
- Adjust flow temperatures and scheduling after works; monitor for a week.
- Add shading for summer: external blinds, shutters, or even vines on the sunniest face.
- Track humidity and CO₂ with small monitors; guide habits, not guesses.
Summer matters as much as winter
External insulation does a second job in July. It slows the afternoon heat wave that typically peaks between 3 and 6 p.m. Materials with higher density add time lag, so indoor temperatures peak later and lower. Pair that with external shading, night purges, and you can cut peak room temperatures by several degrees. Your fan can rest. Your heat pump avoids expensive, hot-hour running.
➡️ How I stopped overspending by identifying one recurring money pattern
➡️ An unexpected predator is threatening Brazil’s jaguars – and it’s multiplying fast
➡️ “I thought I lacked focus,” this habit showed me otherwise
➡️ These ski mistakes happen all the time: “We don’t think about it when we clip into our skis”
How much money are we talking about?
Numbers vary with climate, wall type, and starting condition. Many retrofits report 20–40% lower heating energy when insulation arrives with air sealing and control tweaks. Infiltration alone often accounts for 15–30% of space heating in leaky homes. Slice that, and the boiler breathes easier.
Costs swing, too. In the UK, external wall insulation typically runs £90–£150 per square metre for straightforward facades, plus scaffolding and detail work. In the US, expect $12–$25 per square foot depending on finish and repairs. Payback shortens when you pair grants or when fuel costs climb. Check local schemes such as the Great British Insulation Scheme or state-level rebates under federal incentives in the US.
| Element | Quick check | Why it pays |
|---|---|---|
| Air tightness | Blower-door test; target 3–5 ACH50 after works | Less draft, better comfort at lower thermostat settings |
| Ventilation | Humidity 40–55%; boost extraction where you cook or shower | Healthier air, fewer mould risks, lower heat loss from airing |
| System tuning | Lower flow temp; balance radiators; update schedules | Longer cycles, less cycling loss, quieter operation |
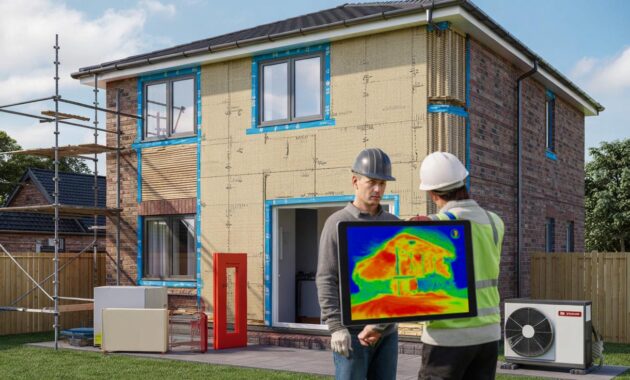
| Thermal bridges | Thermal imaging on a cold morning | Warmer corners, stable paint and plaster, real-life efficiency |
Materials are not one-size-fits-all
Expanded polystyrene brings strong winter performance and a sharp price. Mineral wool adds fire resistance and better sound control. Wood fibre offers density and summer delay. The best pick depends on street noise, sun exposure, planning rules, and your budget. All of them fail when gaps or wet detailing creep in around edges, sills, and balcony slabs.
If you can only do one thing this year, fix the leaks. If you can do two, add ventilation you can trust. Insulation then shows its true value.
What to ask before signing a quote
Good projects start on paper. Ask for U-value calculations, junction details, and how the crew will handle corners, pipe exits, and vents. Request a blower-door test baked into the contract. Confirm fire barriers and fixings by substrate. Check where scaffolding ties will attach and how they patch them. Insist on a final walkthrough in the rain, not just the sun.
Common pitfalls to avoid
- Painting over mould without warming the surface or ventilating properly.
- Insulating the wall but leaving rotten seals around frames.
- Cranking the boiler back to old settings after works.
- Skipping summer shading and blaming insulation for warm rooms.
- Ignoring trickle of rainwater at a gutter that soaks the new layer.
Small tools that make a big difference
A £15 humidity sensor teaches your house faster than any manual. A smoke pencil spots hidden leaks around sockets and skirtings. A smart thermostat with weather compensation, even on a boiler, trims fuel use once you lower flow temperatures. Thermal imaging, even from a borrowed camera on a frosty morning, shows where money leaves: blue at lintels, dark at slab edges, bright splotches at leaky frames.
Extra context for planners and homeowners
If you want a quick sanity check, run a simple heat-loss sketch. Take external wall area, multiply by current U-value, and project the drop after insulation. Add an estimate for infiltration heat loss based on ACH50 and convert to natural ACH using a seasonal factor. This back-of-envelope view tells you where the biggest bite sits: fabric, air, or windows. Spend accordingly.
One last note on moisture risk. When you change a wall’s temperature profile, the dew point moves. Detail window reveals, sills, and vent penetrations with care. Keep rain out of the new layer. Maintain vents in kitchens and baths. That way, the new calm you feel—the quiet warmth, the lack of damp corners—stays through winter and the next one after that.